Create and Manage Announcements
Let your customers know about pre-orders, events, and menu updates with announcements that show up as a banner on your website and (on Pro) as emails and texts to your customers.
Included in all plans
Direct link: /site/admin/announcements
Let your customers know about pre-orders, events, and menu updates with announcements that show up as a banner on your website and (on Pro) as emails and texts to your customers.
Email and SMS for announcements are Pro plan features — upgrade to Pro to send announcements by email or text.
Overview
Announcements are a great way to get the word out when you have something exciting to share — whether you're opening pre-orders for this weekend's bake, sharing a new seasonal menu, or promoting an upcoming market appearance. You can display it right on your website, and if you're on the Pro plan, send an email blast to your subscribers too.
Steps
1. Go to the Announcements page
From your admin sidebar, click Marketing, then Announcements.
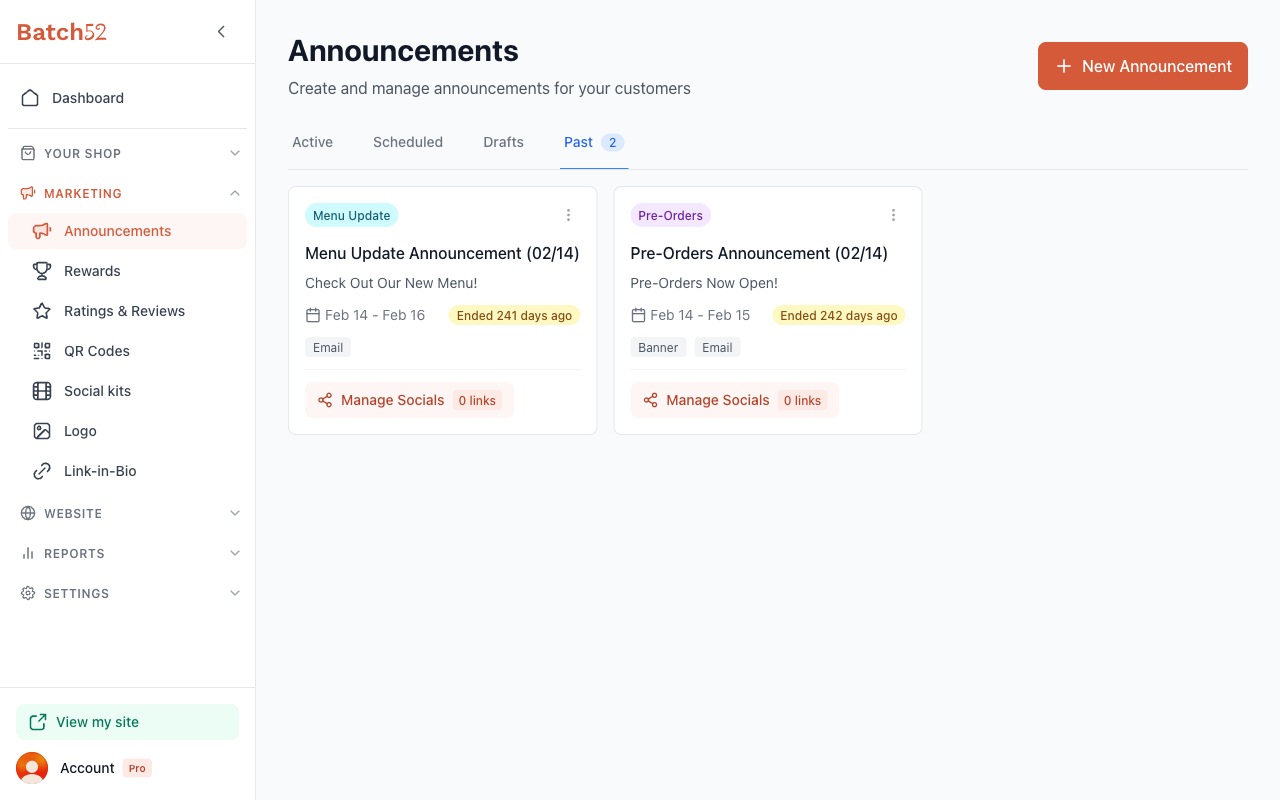
You'll see four tabs to organize your announcements:
- Active — announcements currently live on your site
- Scheduled — announcements set to go live at a future date
- Drafts — announcements you've started but haven't published yet
- Past — announcements that have ended
2. Start a new announcement
Click the + New Announcement button in the top right corner. A New Announcement form opens with everything on one scrolling page: type, timing, details and channels.
3. Choose your announcement type
Under Type, pick the one that best fits what you're announcing:
- Pre-Orders — Let customers pre-order items before a bake day
- Event — Promote an upcoming market, fair, or event appearance
- Menu Update — Announce menu changes, new items, or seasonal offerings
- Custom — Write a fully custom announcement with your own content
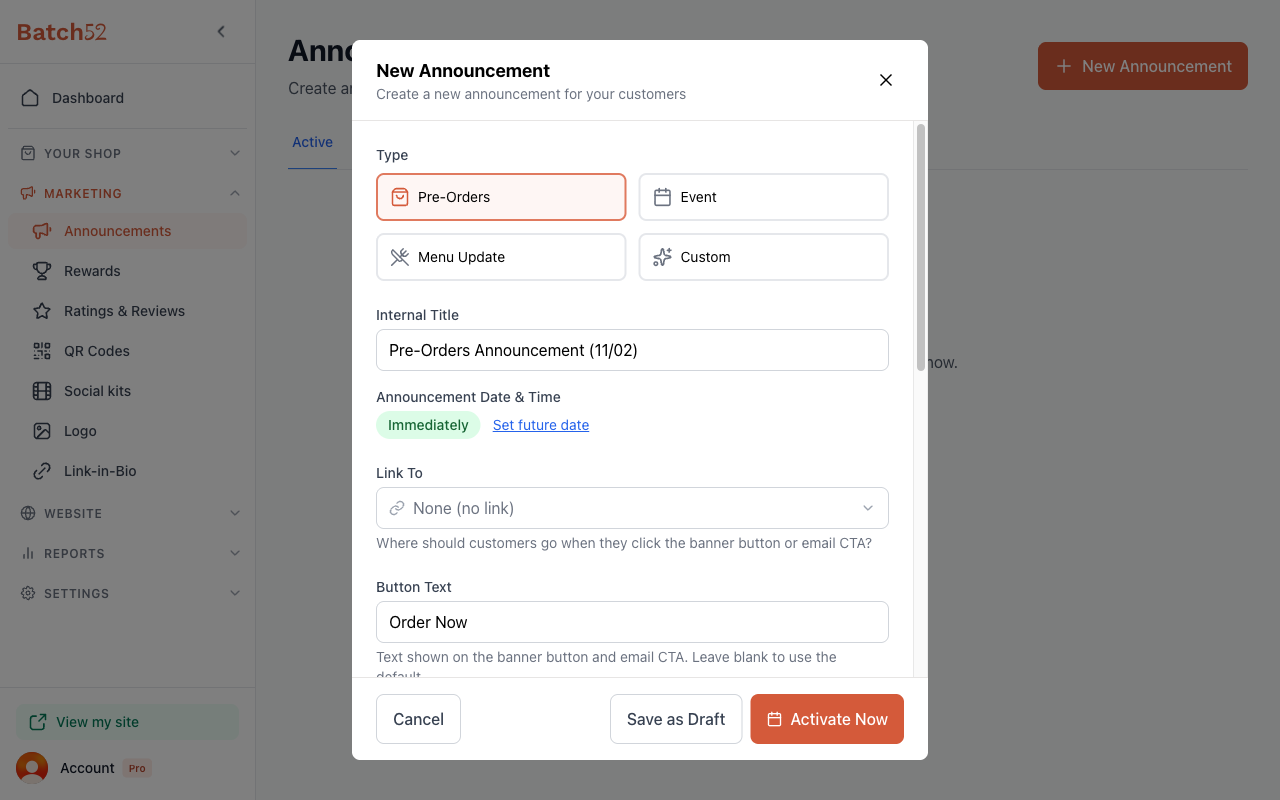
The type you choose fills in a starting title, headline, message and button text for you (you can always customize them). If you switch types after editing those fields, Batch52 asks before replacing your changes.
4. Set the timing
Right below the type, set when your announcement goes live:
- Internal Title — Auto-generated for your reference (customers won't see this)
- Announcement Date & Time — Starts as Immediately. Click Set future date to pick a later date and time instead, or Set to Now to switch back.
5. Add your details
Customize what your announcement says:
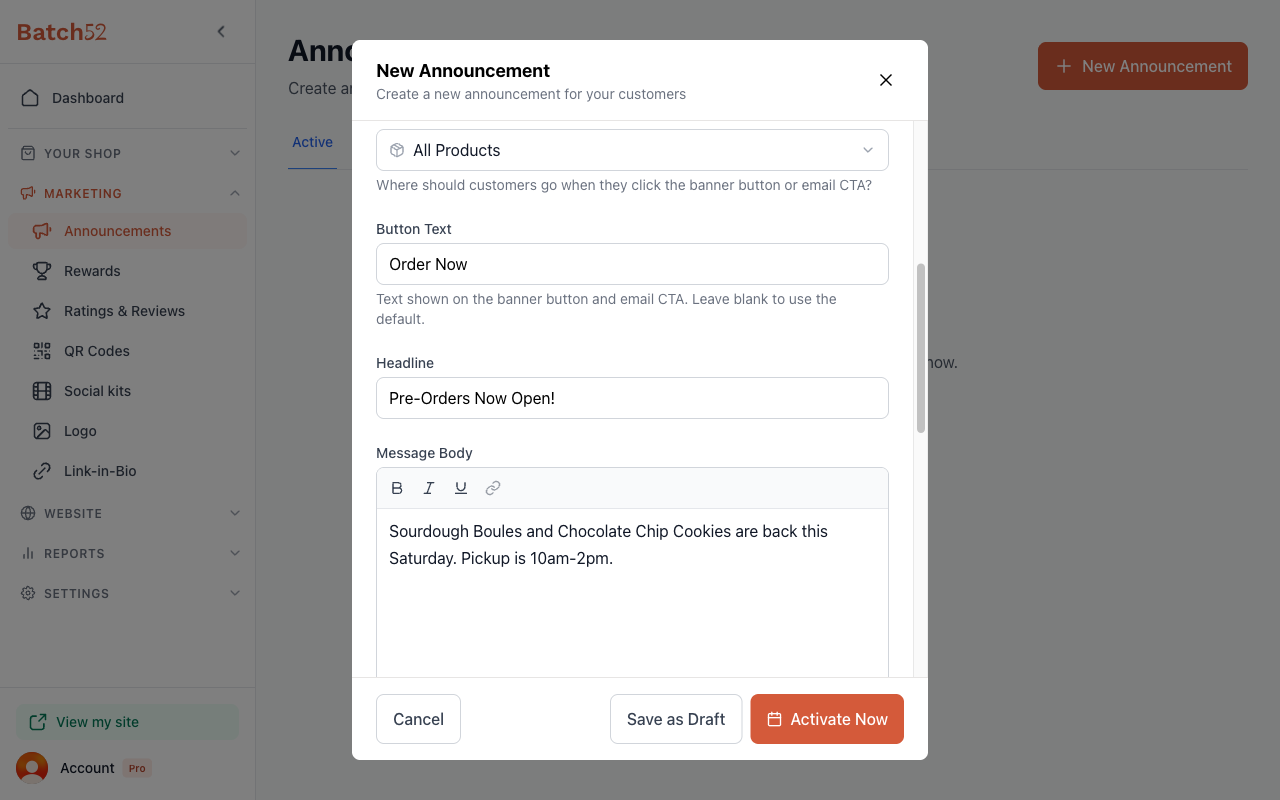
- Link To — Where the button on your banner and email should go. Choose a quick link (Homepage or All Products), enter a custom URL, or leave it as None (no link).
- Button Text — The text on your call-to-action button (for Pre-Orders the default is "Order Now")
- Headline — A short, attention-grabbing headline. Batch52 fills this in based on your type (e.g., "Pre-Orders Now Open!"), but you can change it.
- Message Body — The main text of your announcement. You can format it with bold, italic, underline, and links. If you leave it empty, Batch52 uses a starter message for your type.
6. Choose your channels
Scroll down to Channels and decide how you want to reach your customers:
-
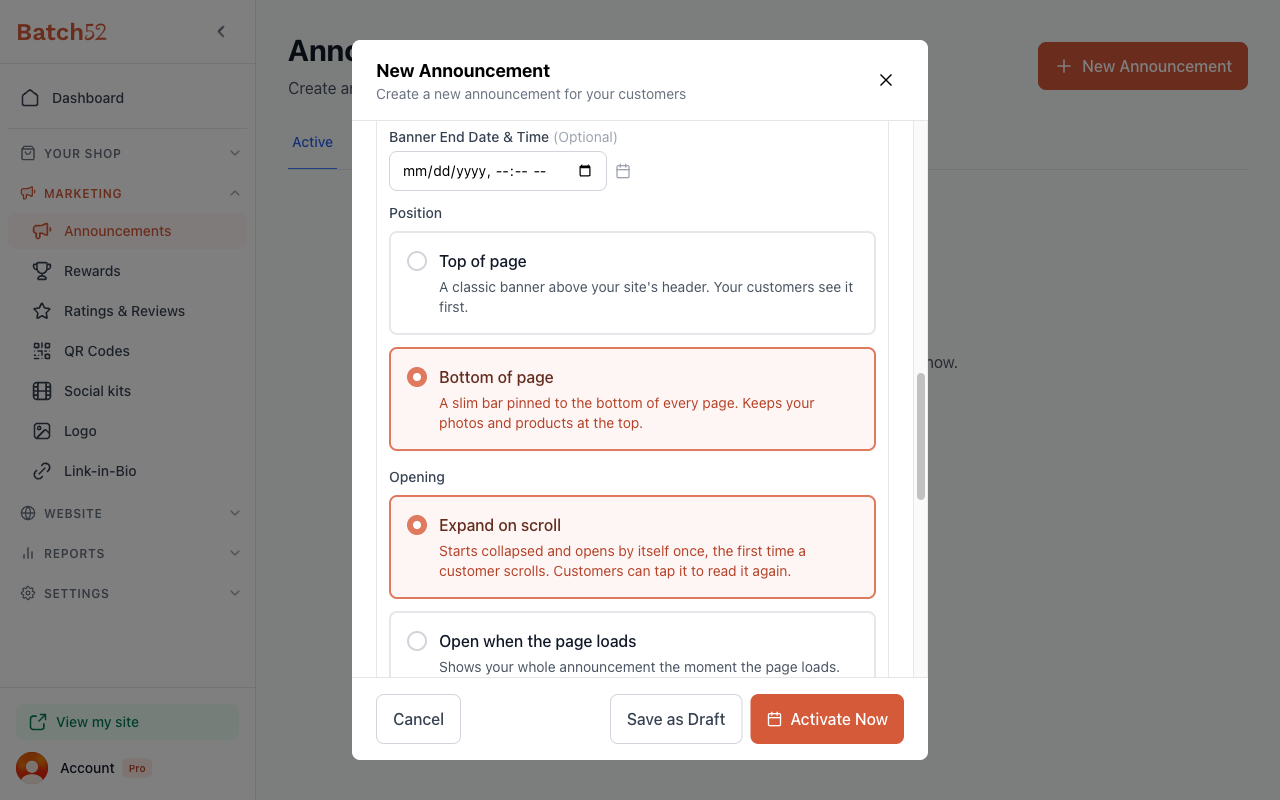
Website Banner — Toggle this on to show your announcement on your public site. You can set an optional Banner End Date & Time, and two settings sit above the live preview:
- Position — Top of page is a classic banner above your site's header, in your shop's theme colours, so customers see it first. Bottom of page is a slim bar pinned to the bottom of every page, which keeps your photos and products at the top.
- Opening — Expand on scroll starts collapsed and opens by itself once, the first time a customer scrolls; customers can tap it to read it again. Open when the page loads shows your whole announcement the moment the page loads; customers can collapse it, and it stays collapsed for them.
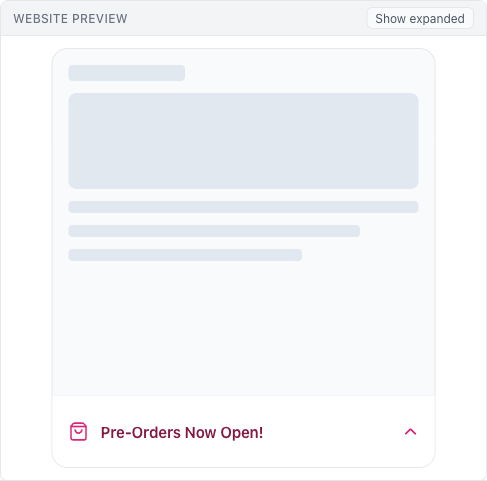
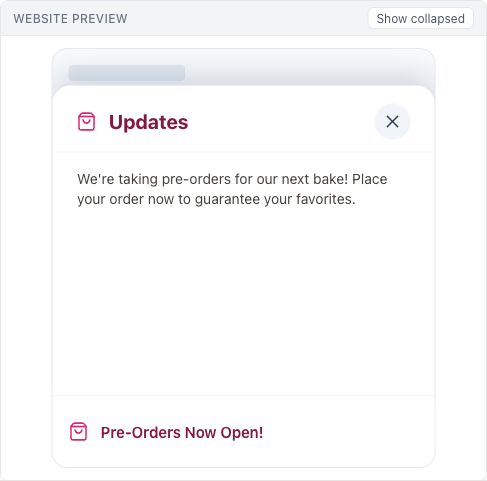
Each announcement you create starts with the Position and Opening you chose last time. Below the settings, a Website Preview shows how it looks. Click Show expanded to see the opened announcement with your message, and Show collapsed to see the banner on its own.
-
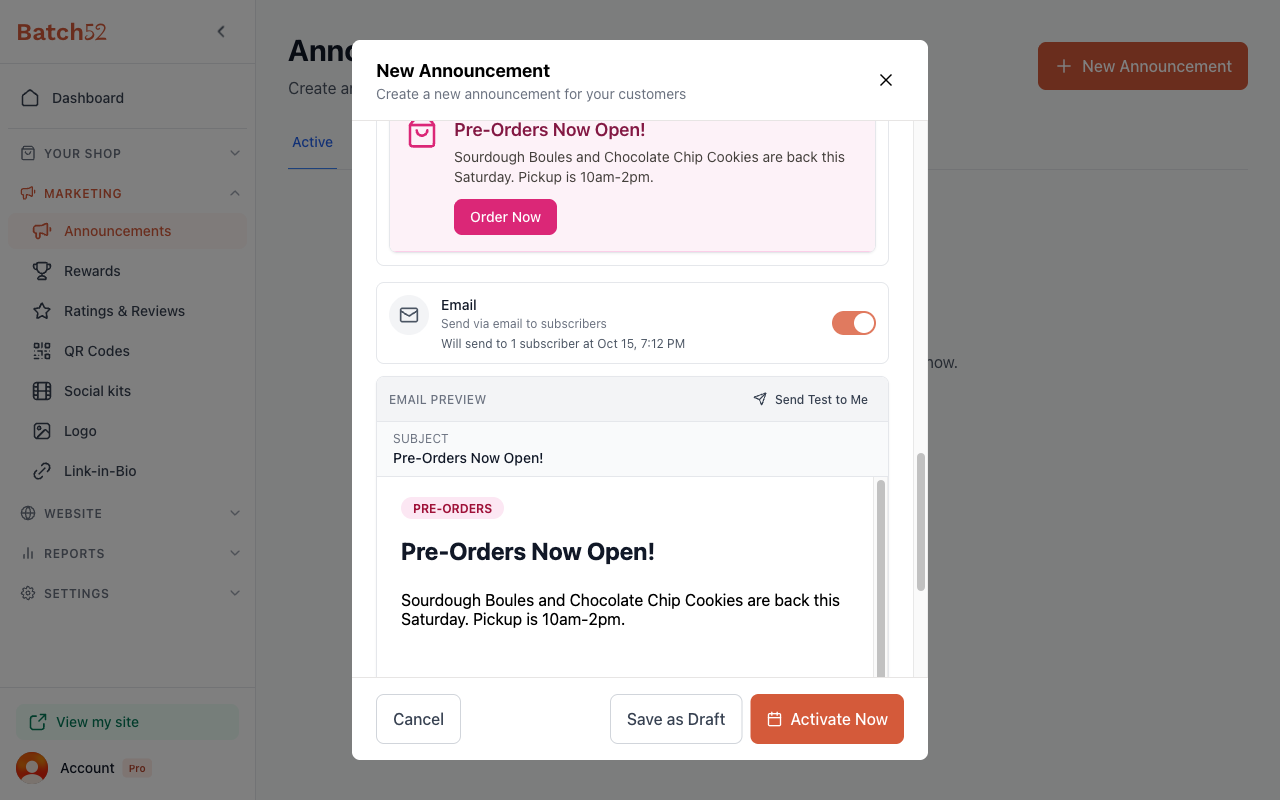
Email (Pro) — Toggle this on to send an email to your subscribers. You'll see how many subscribers will receive it, plus an Email Preview.
-
SMS (Pro) — Toggle this on to send a text message to customers who opted in.
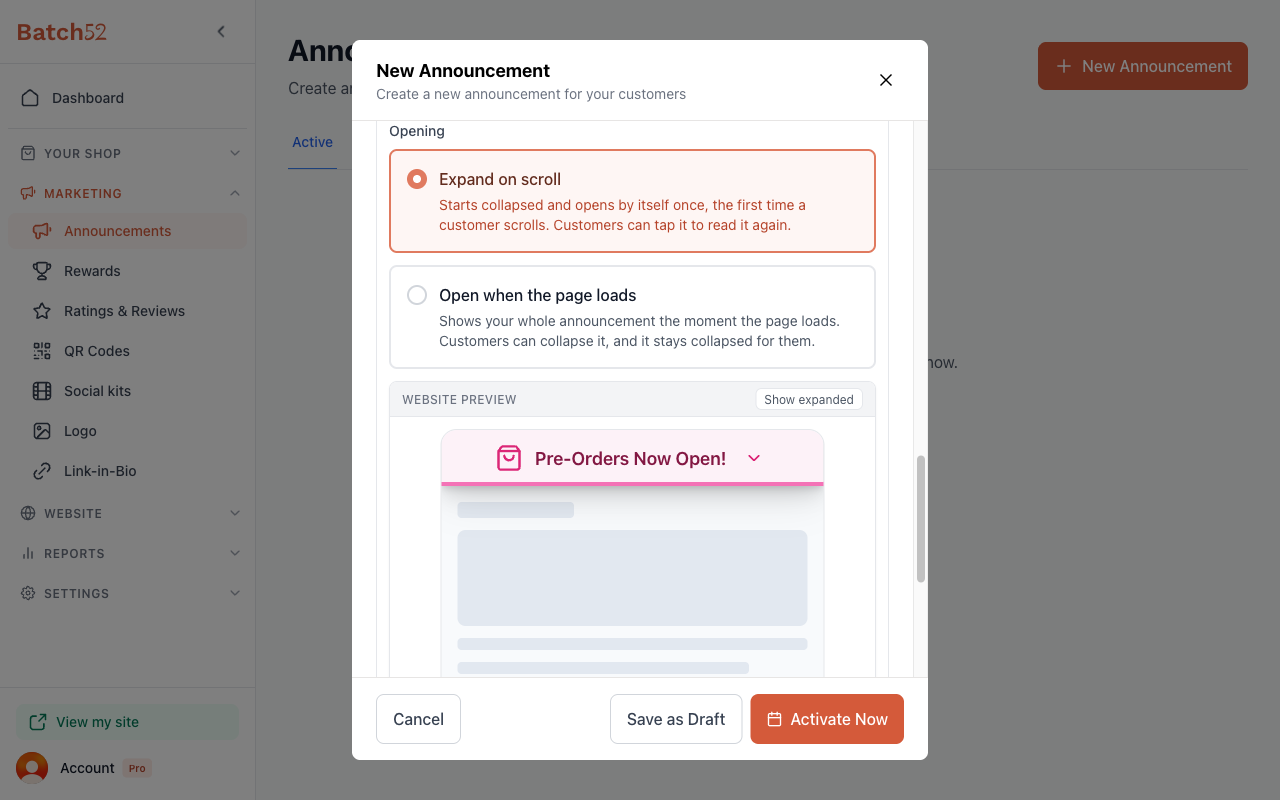
With Top of page selected, the preview shows the classic banner above your site's header instead:
If you have Email turned on, click Send Test to Me at the top of the email preview to send a test email to yourself before going live — a great way to double-check everything looks right.
7. Save, schedule or publish
The buttons at the bottom of the form let you choose what happens next:
- Save as Draft — Save it for later without publishing
- Schedule — Shows when you've set a future date; your announcement goes live automatically at that time
- Activate Now — Shows when the announcement starts immediately; it publishes right away
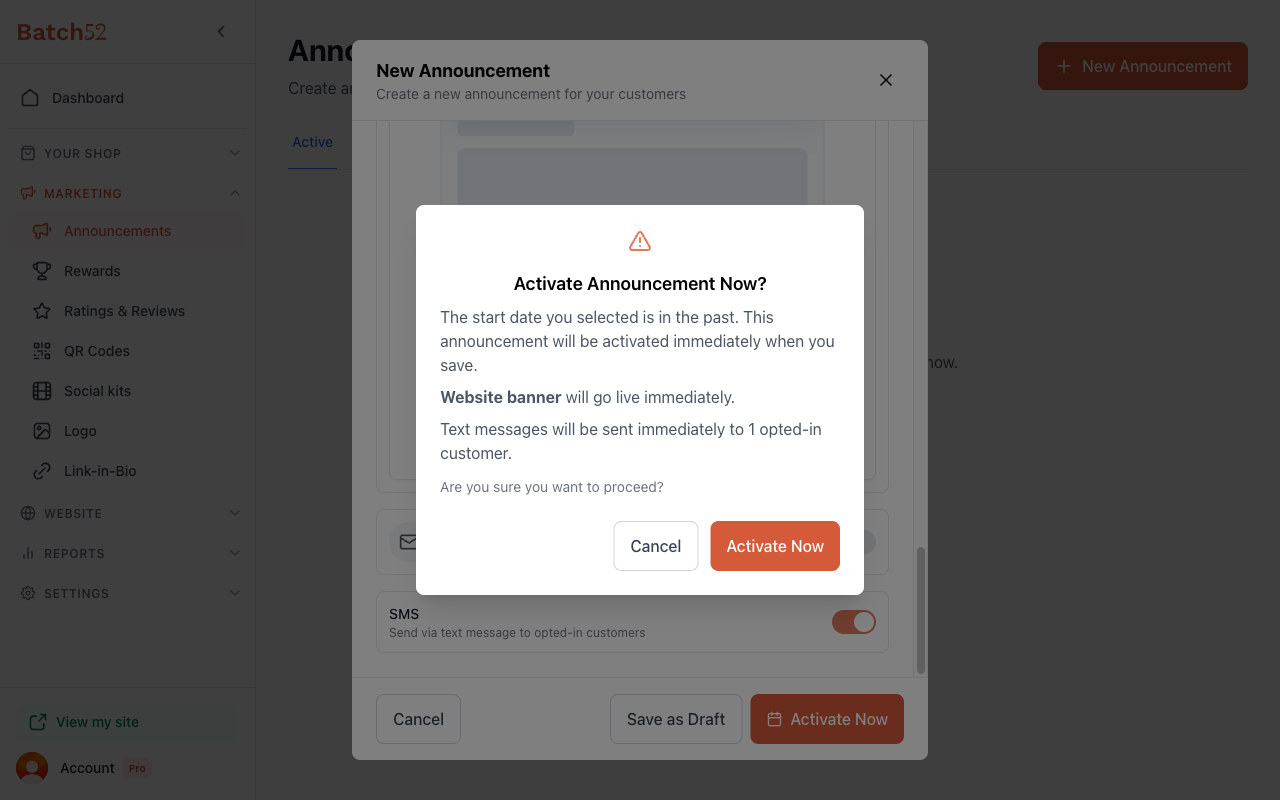
If you choose Activate Now, a confirmation dialog names every channel that will fire: the website banner going live, emails going out to your subscribers, and how many opted-in customers will be texted. Click Activate Now again to confirm, or Cancel to go back.
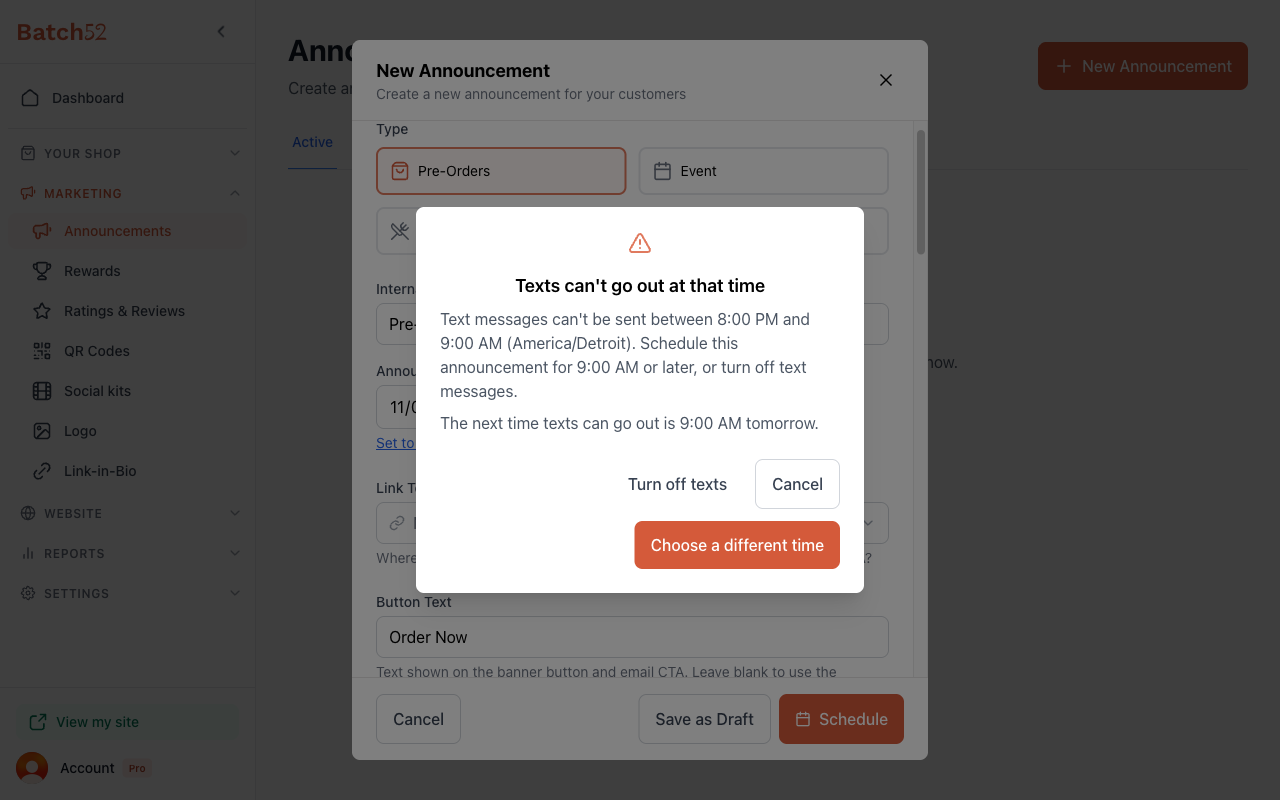
Text messages have quiet hours. Texts are never sent between 8:00 PM and 9:00 AM in your shop's timezone. If SMS is on and your start time falls inside those hours, whether you click Activate Now or Schedule, a dialog called Texts can't go out at that time explains why and tells you the next time texts can go out. Click Choose a different time to move your start to the next 9:00 AM, or Turn off texts to keep your start time and switch SMS off; then click Schedule or Activate Now again. Cancel takes you back to the form. Save as Draft is never blocked by quiet hours.
8. Your announcement is live!
After activating, you'll see an "Announcement is now live" message and your new announcement appears under the Active tab. Scheduled announcements move to the Scheduled tab, and drafts to Drafts.
What your customers see
Website banner
What customers see depends on the Position you picked:
- Top of page — A classic banner in your shop's theme colours sits above your site's header, showing your headline with a chevron to open or close it. When it's open, your message and button appear right below the headline.
- Bottom of page — A slim bar pinned to the bottom of every page shows your headline. When it opens, on a phone it slides up as a sheet; on a computer a panel grows up out of the bar in the middle of the screen. While it's open, your button (linking to your products or wherever you pointed it) sits in the bar beside the headline. Customers can close it by dragging it down, tapping outside it, clicking the X, or pressing Escape, and it tucks back into the bar. They can tap the bar any time to open it again.
The Opening setting decides how it first appears. With Expand on scroll, the banner starts collapsed and opens on its own once, the first time a customer scrolls, so they see your full message. With Open when the page loads, the whole announcement is open the moment the page loads. Either way, once a customer collapses it, it stays collapsed for them on later visits until they open it again.
Announcement email
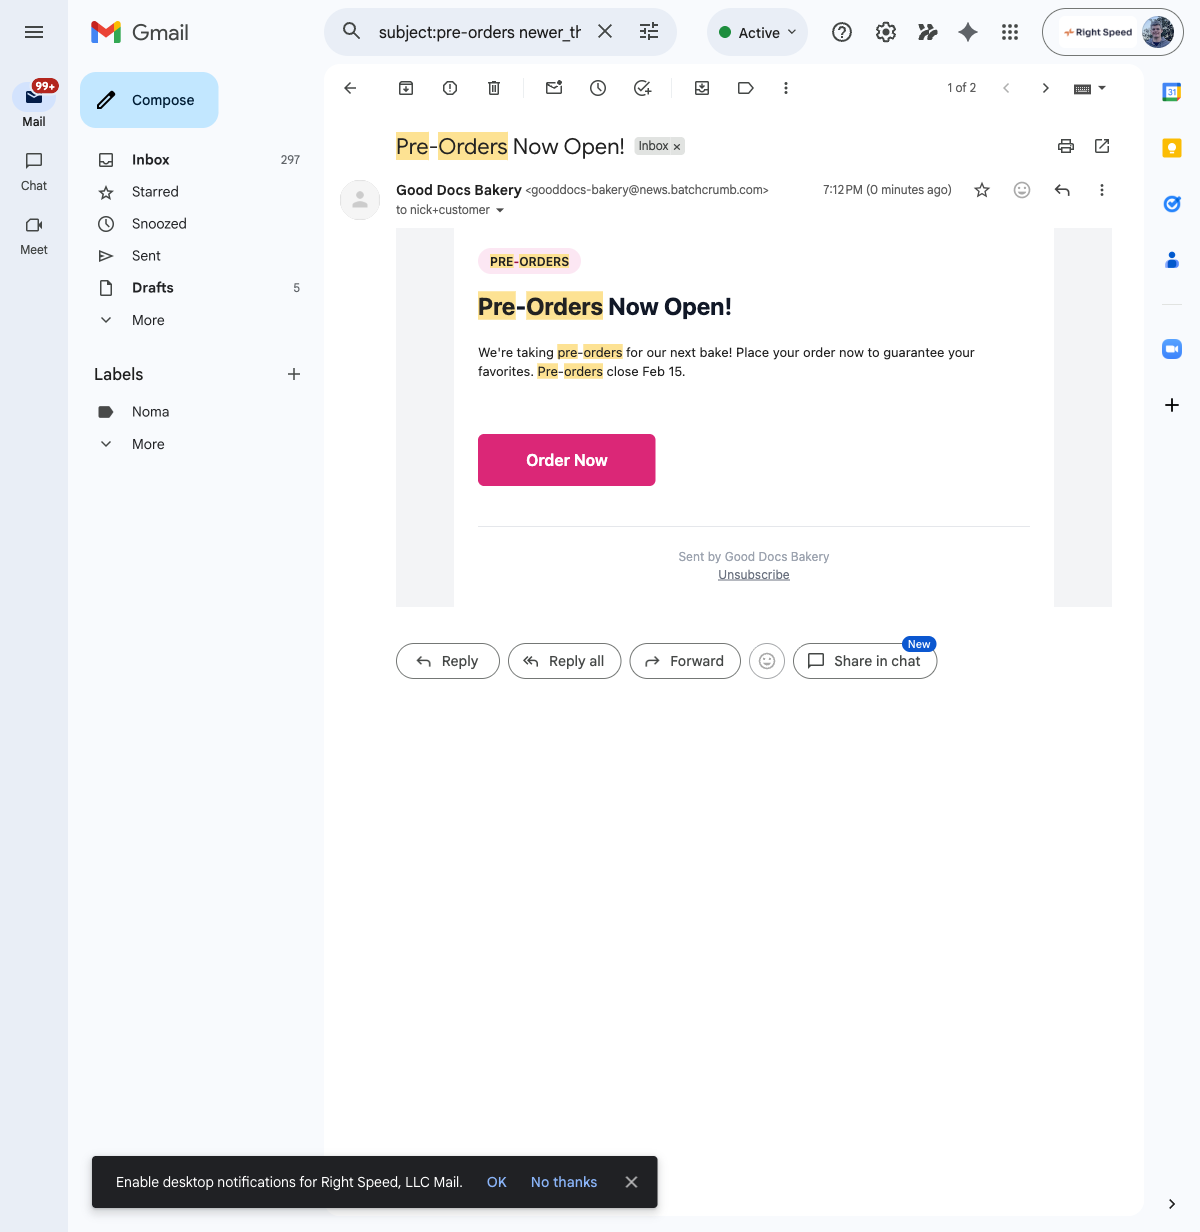
Subscribers receive a styled email with your announcement type badge, headline, message, and a call-to-action button. The email includes your business name and an unsubscribe link at the bottom.
Managing active announcements
Back on the Announcements page, your active announcement card shows:
- Type badge and status (e.g., "Showing on site")
- Date range with a countdown (e.g., "13 hours left")
- Reach section — shows which channels are active, when emails were sent, and delivery stats
- Manage Socials (Pro) — create shareable links for Facebook, Instagram, Nextdoor, and more with click tracking
Use the three-dot menu on the announcement card to Edit, Clone or Archive your announcement. Archiving takes it down early. A cloned announcement keeps the original's content and Website Banner setting, but starts with Email and SMS turned off, so you choose each time whether to send.
Tips
- Start with the auto-generated content and tweak it — Batch52 writes a solid first draft based on your announcement type
- Always send yourself a test email before going live to make sure everything looks right
- Schedule announcements in advance so you don't have to remember to publish on bake day morning
- Set a Banner End Date & Time and your banner disappears on its own, so you don't need to take it down manually
- On Pro, use the Manage Socials button to create shareable links you can post on your social media for extra reach